
This is a Reference guide to Pixenate's Javascript properties, functions and the special elements used by Pixenate™. This reference guide should be used in conjunction with it's companion document - Pixenate™ Customization Guide. The VARIABLES section lists all of the Pixenate variables which can be read or modified. The FUNCTIONS section lists and describes all of the public functions in Pixenate™ API. The ELEMENTS section lists and describes all of the special elements used by Pixenate™. The CALLBACKS section lists and describes all of the events which Pixenate fires and which can be subscribed to in custom code.
Pixenate uses a number of javascript variables...
PXN8 is the name of the global variable used by Pixenate to store variables and functions used by the Pixenate javascript API. PXN8 acts as a global namespace for all such variables and functions.
Specifies where Pixenate™ is located relative to the Web Root. If you install Pixenate in a directory other than one named 'pixenate' in the webroot folder, You must change this value accordingly. For example if your webroot is /var/www/html and you have installed PXN8 in /var/www/html/pixenate, then you should set PXN8.root = "/pixenate/".
String
"/pixenate/"
Specifies the basename Pixenate™ CGI script
String
"pxn8.pl"
replaceOnSave specifies how PXN8 handles image URLs. If set to true then PXN8 always assumes that the photo at the supplied URL has changed. If set to false then PXN8 will assume that the photo at the supplied url hasn't changed since it was last retrieved. If the photo URL maps to a filepath on the webserver and your photo-editing application overwrites the original file when saved then you should set this to true. By default, it's set to true to avoid potential caching problems when save operation overwrites the original image.
boolean
true
The currently enforced aspect-ratio which is enforced when the user selects an area of the photo. If the value is anything other than...
{width: 0, height: 0}
...then that aspect ratio is enforced. E.g. to enforce a 2x3 aspect ratio on selections...
PXN8.selectByRatio("2x3");
Object (with width and height properties). READ ONLY
{width: 0, height: 0}
The current mouse position on the photo. The PXN8.position property takes into account the current magnification level so it is always the position of the mouse relative to the top-left corner of the un-magnified photo.
Object (with x and y properties). READ ONLY
{x: "-", y: "-"}
PXN8.style is a namespace used to define style-related variables used by Pixenate.
This variable defines the opacity and color of the non-selected areas of the photo.
Object (with opacity and color properties).
{opacity: 0.33,
  color:   "black"}
Defines the color, and size (in pixels) of the resize handles which appear at the corners and sides of the selected area of the image.
Object (with color and size properties).
{color: "white",
  size:  6};
Controls the selection behaviour. By default users cannot select an area which clips the bounds of the image. However, there are cases where the user might want to do this - for example when adding clip-art to an image , part of the clip-art may be off-image (e.g. adding santa hats to photos - constraining the overlay tool so that all of the overlay image must appear on top of the photo does not make sense).
boolean
true
By default Pixenate assumes it is working with photographic images which don't have an alpha channel. If you would like to edit .GIF or .PNG images while keeping the alpha channel information then set this variable to false.
boolean
true
Hooks can be added to Pixenate using the following pre-defined Pixenate event types. For more information on adding hooks to Pixenate please refer to the PXN8.listener set of functions.
This event fires whenever a new photo is loaded into the web page as a result of an editing operation. It does not fire when the user Undoes or Redoes an operation - to catch those events use PXN8.ON_IMAGE_CHANGE.
function myOnImageLoad(eventType){
     alert("A new image has been loaded");
 }
 PXN8.listener.add(PXN8.ON_IMAGE_LOAD,myOnImageLoad);
This event fires whenever the photo is changed as a result of an editing operation (including the undo and redo family of operations).
function myOnImageChange(eventType){
     alert("The image has been modified");
 }
 PXN8.listener.add(PXN8.ON_IMAGE_CHANGE,myOnImageChange);
This event fires before the photo is changed as a result of an editing operation (including the undo and redo family of operations).
function myBeforeImageChange(eventType){
     alert("The image is about to be modified");
 }
 PXN8.listener.add(PXN8.BEFORE_IMAGE_CHANGE,myBeforeImageChange);
This event is fired whenever the magnification level of the photo has been changed (when the user zooms in and out).
function myOnImageZoom(eventType){
     alert("You have zoomed the image to " + (PXN8.zoom.value() * 100) + "%");
 };
 PXN8.listener.add(PXN8.ON_IMAGE_ZOOM, myOnImageZoom);
This event fires whenever the selection area is modified. Do not do anything which requires User interaction (such as alert, confirm, prompt etc) in your listener as this event can fire quite frequently while the user is resizing, moving or initializing the selection area using the mouse. If you want your hook to be called after the user has finished selecting the area, then use PXN8.ON_SELECTION_COMPLETE instead.
Please see the Limiting Selection Size example, which demonstrates how to modify the selection behaviour so that a minimum area of 400x200 pixels must be selected.
This event fires when the user mouseups after making a selection or when a selection has been made programmatically.
function myOnSelectionComplete(eventType){
     var log = document.getElementById("my_log");
     var sel = PXN8.getSelection();
     alert("You selected: " + sel.top + "," + sel.left + "," +
           sel.width + "," + sel.height);
 }
 PXN8.listener.add(PXN8.ON_SELECTION_COMPLETE,myOnSelectionComplete);
This event is fired when an image update fails or an image fails to load.
Adds a new callback function to the list of functions to be called when a PXN8 event occurs. Listeners can be added for the following event types... * PXN8.ONZOOMCHANGE : Fired when the image is zoomed in or out. * PXN8.ONSELECTIONCHANGE : Fired when the selection has changed (and during a manual selection operation). * PXN8.ONSELECTIONCOMPLETE : Fired when the user has completed making a selection or when the selection has changed programattically. * PXN8.ONIMAGECHANGE : Fired when the image has been modified. This is fired after the changed image has been loaded into the browser.
The supplied callback parameter.
The following snippet of code displays an alert message every time the image is modified.
// add an anonymous function as a listener
 //
 var myListener = PXN8.listener.add(PXN8.ON_IMAGE_CHANGE, function(eventType){
     if (eventType == PXN8.ON_IMAGE_CHANGE){
        alert("The image has changed");
     }
 });
The code above is equivalent to...
// define and name the function
 function myListener(eventType){
     if (eventType == PXN8.ON_IMAGE_CHANGE){
        alert("The image has changed");
     }
 }

 // add the named function
 PXN8.listener.add(PXN8.ON_IMAGE_CHANGE,myListener);
PXN8.listener.remove PXN8.listener.onceOnly
Removes a callback function from the list of functions to be called when a PXN8 event occurs.
PXN8.listener.remove(PXN8.ON_IMAGE_CHANGE,myListener);
PXN8.listener.add PXN8.listener.onceOnly
Add a special-case of listener that will only be invoked once and once only.
The newly added Listener.
PXN8.listener.add PXN8.listener.remove
Pixenate's core javascript API relies on the following functions...
Call this function to initialize the PXN8 editor.
The image_url parameter can be any of the following.
Alternatively it can be an object with 2 attributes url (see above) and filepath. The filepath should be a path relative to where Pixenate is installed and which can be used by the Pixenate server CGI to access the image from the server's filesystem.
PXN8.initialize() can also be used to load images from a database or other custom source. For example, if you keep your images as BLOBs in a database you can create a custom image loader by specifying a source parameter. For more information please see http://sxoop.wordpress.com/2009/03/24/pixenate-virtual-directories-and-secure-websites/ .
Pixenate can be initialized anywhere on the page as long as the PXN8.initialize() function is called after the 'pxn8_canvas' div has been parsed by the browser. For example the following code won't work on many browsers...
WRONG
<script type="text/javascript">PXN8.initialize("http://pixenate.com/pixenate/images/samples/hongkong.jpg");</script>
 <div id="pxn8_canvas"></div>
The correct approach is as follows...
<div id="pxn8_canvas"></div>
 <!-- declare the pxn8_canvas BEFORE calling initialize -->
 <script type="text/javascript">PXN8.initialize("http://pixenate.com/pixenate/images/samples/hongkong.jpg");</script>
Another approach is to call PXN8.initialize() when the window.onload event fires...
<!-- the following javascript block can appear anywhere on the page -->
 <script type="text/javascript">
   PXN8.dom.addLoadEvent(function(){
       // pxn8_canvas will have been parsed by the time this javascript is executed.
       PXN8.initialize("http://pixenate.com/pixenate/images/samples/hongkong.jpg");
   });
 </script>
Selects an area of the image. Use this function to programmatically select an area of the image.
Alternatively you can provide a single object as a parameter (with the following properties)...
The following example code will select the top half of the photo...
var theImage = document.getElementById("pxn8_image");
 var zoomValue = PXN8.zoom.value();
 //
 // the image's width and height might not reflect the true width and height if the image
 // has been zoomed in or out.
 //
 var realWidth = theImage.width / zoomValue;
 var realHeight = theImage.height / zoomValue;

 PXN8.select(0, 0, realWidth, realHeight / 2);
For an example of limiting the selection area by size please click here
PXN8.getSelection PXN8.selectByRatio
Enable selection of parts of the photo. No need to call this at startup because Selection will be enabled by default.
Please see the Disabling Selection example, which demonstrates how to disable and enable selection.
null
Return a Rect that represents the current selection.
An object with the following properties... * top : The topmost coordinate on the Y axis of the selected area. * left: The leftmost coordinate on the X axis of the selected area. * width: The width of the selected area. * height: The height of the selected area.
var selectedArea = PXN8.getSelection();
 alert ("You have selected an area " + selectedArea.width + "x" + selectedArea.height );
PXN8.select PXN8.selectByRatio
Selects an area using an aspect ratio of the form "WxH" where W is width and H is height.
Assuming the user is working with a photo which is 300x225, calling PXN8.selectByRatio("2x3") will result in the following selection... {width: 300, height: 200, left: 0, top: 12}
| Original | PXN8.selectByRatio("2x3") |
|
|
| Original | PXN8.selectByRatio("2x3",true) |
|
|
PXN8.select PXN8.selectAll PXN8.unselect PXN8.getSelection
Rotates the selection area by 90 degrees.
| Before | After PXN8.rotateSelection() |
 |
 |
PXN8.select PXN8.selectByRatio PXN8.selectAll PXN8.unselect PXN8.getSelection
Selects the entire photo area.
| Before | After *PXN8.selectAll()* |
|
 |
PXN8.select PXN8.selectByRatio PXN8.rotateSelection PXN8.unselect PXN8.getSelection
Unselect the entire photo. The selection will be discarded.
Returns the relative URL to the uncompressed 100% full quality image. This version of the image is not normally downloaded and displayed in the browser during an editing session because it is typically much larger than the more bandwidth-friendly lower resolution image (typically using 85% quality). Normally this function be called from pxn8saveimage or some other function which will save the image to the server.
A path (relative the PXN8.root) to the uncompressed image if the image has changed or false if no changes have been made.
var uncompressed = PXN8.getUncompressedImage();

  if (uncompressed != false)
  {
       // the image has been modified
       // uncompressed = "cache/01_feabcdd1d0workingjpg.jpg";
     // view the image
     document.location = PXN8.server + PXN8.root + "/" +  uncompressed;
 }
PXN8.save.toServer pxn8saveimage
Return a list (a copy) of all the operations which have been performed (doesn't include undone operations).
A array of objects each of which is a distinct operation which was performed on the image.
The following code retrieves all of the operations performed in the current editing session and displays a series of alerts telling the user what they have done.
var whatYouDid = PXN8.getScript();
 for (var i = 0; i < whatYouDid.length; i++){
     alert("you performed a '" + whatYouDid[i].operation + "' operation");
 }
Is pixenate currently updating the photo ?
true or false depending on whether the photo is currently being updated.
Returns the real width and height of the image.
Returns an object with width and height attributes - the real width and height of the image.
Converts a given javascript object to a string which can be evaluated as a JSON expression.
A string which can later be evaluated as a JSON expression. Boolean literals (true and false) are converted to strings.
var myObject = {
                 name: "Walter Higgins",
                 contacts: ["John Doe", "K DeLong"],
                 available: false
                 };

 var myObjectAsString = PXN8.objectToString(myObject);

 // myObjectAsString = '{"name":"Walter Higgins", "contacts":["John Doe","K DeLong"],"available":"false"}';
The following variables and functions are used for zooming in and out. Zooming (or magnification) only changes the appearance of the photo in the browser and does not change the photo's real size.
PXN8.zoom is a namespace used by all of the zoom-related variables and functions.
Users can zoom in and out of a photo by cycling through an array of predefined zoom values. PXN8.zoom.values specifies the levels of magnification a user can cycle through.
Array
[0.25, 0.5, 0.75, 1.0, 1.25, 1.5, 2, 3, 4 ];
PXN8.zoom.index is an index into the (zero-based) array of PXN8.zoom.values.
number
3
Get the current magnification value in use. This is expressed as a float. e.g. 200% magnification returns a value of 2.0
A float value - the current magnification factor.
PXN8.zoom.canZoomIn PXN8.zoom.canZoomOut PXN8.zoom.zoomIn PXN8.zoom.zoomOut PXN8.zoom.zoomByIndex PXN8.zoom.toSize PXN8.zoom.zoomByValue
Indicates whether or not the image magnification can be increased any further.
true or false.
PXN8.zoom.canZoomOut PXN8.zoom.zoomByIndex PXN8.zoom.zoomIn PXN8.zoom.zoomOut PXN8.zoom.value PXN8.zoom.toSize PXN8.zoom.zoomByValue
Indicates whether or not the image magnification can be decreased any further.
true or false.
PXN8.zoom.canZoomIn PXN8.zoom.zoomByIndex PXN8.zoom.zoomIn PXN8.zoom.zoomOut PXN8.zoom.value PXN8.zoom.toSize
Zoom the photo to a magnification level at the specified index (see the PXN8.zoom.values array for a list of magnification levels.
index : The index into the PXN8.zoom.values array. E.g. PXN8.zoom.values has this value
[0.25, 0.5, 0.75, 1.0, 1.5, 2]
The PXN8.zoom.zoomByIndex(2) will zoom the image to 75% (0.75 is the value a PXN8.zoom.values[2]).
PXN8.zoom.canZoomIn PXN8.zoom.canZoomOut PXN8.zoom.zoomIn PXN8.zoom.zoomOut PXN8.zoom.value PXN8.zoom.toSize PXN8.zoom.zoomByValue
Zoom the photo to a magnification level such that the photo's width does not exceed the specified width. The height will be adjusted accordingly. Note: This operation does not resize the photo permanently. If the photo's width is already less than the specified width then no action is taken.
PXN8.zoom.canZoomIn PXN8.zoom.canZoomOut PXN8.zoom.zoomIn PXN8.zoom.zoomOut PXN8.zoom.value PXN8.zoom.toSize PXN8.zoom.zoomByValue PXN8.zoom.toWidth PXN8.zoom.expandToWidth PXN8.zoom.toHeight PXN8.zoom.shrinkToHeight PXN8.zoom.expandToHeight
Zoom the photo to a magnification level such that the photo's width matches the specified width. The height will be adjusted accordingly. Note: This operation does not resize the photo permanently. If the photo's width is already greater than the specified width then no action is taken.
PXN8.zoom.canZoomIn PXN8.zoom.canZoomOut PXN8.zoom.zoomIn PXN8.zoom.zoomOut PXN8.zoom.value PXN8.zoom.toSize PXN8.zoom.zoomByValue PXN8.zoom.toWidth PXN8.zoom.expandToWidth PXN8.zoom.toHeight PXN8.zoom.shrinkToHeight PXN8.zoom.expandToHeight
Zoom the photo to a magnification level such that the photo's height matches the specified height. The height will be adjusted accordingly. Note: This operation does not resize the photo permanently. If the photo's height is already greater than the specified height then no action is taken.
PXN8.zoom.canZoomIn PXN8.zoom.canZoomOut PXN8.zoom.zoomIn PXN8.zoom.zoomOut PXN8.zoom.value PXN8.zoom.toSize PXN8.zoom.zoomByValue PXN8.zoom.toWidth PXN8.zoom.expandToWidth PXN8.zoom.toHeight PXN8.zoom.shrinkToHeight PXN8.zoom.expandToHeight
Zoom the photo to a magnification level such that the photo's width matches the specified width. The height will be adjusted accordingly. Note: This operation does not resize the photo permanently.
PXN8.zoom.canZoomIn PXN8.zoom.canZoomOut PXN8.zoom.zoomIn PXN8.zoom.zoomOut PXN8.zoom.value PXN8.zoom.toSize PXN8.zoom.zoomByValue PXN8.zoom.toWidth PXN8.zoom.expandToWidth PXN8.zoom.toHeight PXN8.zoom.shrinkToHeight PXN8.zoom.expandToHeight
Zoom the photo to a magnification level such that the photo's height matches the specified width. The width will be adjusted accordingly. Note: This operation does not resize the photo permanently.
PXN8.zoom.canZoomIn PXN8.zoom.canZoomOut PXN8.zoom.zoomIn PXN8.zoom.zoomOut PXN8.zoom.value PXN8.zoom.toSize PXN8.zoom.zoomByValue PXN8.zoom.toWidth PXN8.zoom.toWidth PXN8.zoom.expandToWidth PXN8.zoom.shrinkToHeight PXN8.zoom.expandToHeight
Zoom in (Increase the magnification level) so the photo appears bigger. The amount by which the magnification level increases depends on the values in the PXN8.zoom.values array.
PXN8.zoom.canZoomIn PXN8.zoom.canZoomOut PXN8.zoom.zoomByIndex PXN8.zoom.zoomOut PXN8.zoom.value PXN8.zoom.toSize PXN8.zoom.zoomByValue
Zoom out (Decrease the magnification level) so the photo appears smaller. The amount by which the magnification level decreases depends on the values in the PXN8.zoom.values array.
PXN8.zoom.canZoomIn PXN8.zoom.canZoomOut PXN8.zoom.zoomByIndex PXN8.zoom.zoomIn PXN8.zoom.value PXN8.zoom.toSize PXN8.zoom.zoomByValue
Zoom the image to a fixed width and height.
To adjust the visible area of the photo (when it's first loaded) so that it's height is 500 Pixels high (and the width is also adjusted accordingly)
PXN8.listener.onceOnly(PXN8.ON_IMAGE_LOAD, function(){
    var img = document.getElementById("pxn8_image");
    var oh  = img.height;
    var ow = img.width;
    var nh = 800; // new height
    var ratio = oh / nh;
    var nw = ow / ratio;
    PXN8.zoom.toSize(nw,nh);
 });
PXN8.zoom.canZoomIn PXN8.zoom.canZoomOut PXN8.zoom.zoomByIndex PXN8.zoom.zoomIn PXN8.zoom.value PXN8.zoom.toSize PXN8.zoom.zoomByValue
Zoom the photo to a magnification level.
The PXN8.zoom.zoomByValue(2) will zoom the image to 200% .
PXN8.zoom.canZoomIn PXN8.zoom.canZoomOut PXN8.zoom.zoomIn PXN8.zoom.zoomOut PXN8.zoom.value PXN8.zoom.toSize PXN8.zoom.zoomByIndex
As well as the core selection, zoom and initialization functions, the Pixenate™ javascript API is composed of a series of photo-editing functions which perform various modifications to the photo by calling equivalent CGI functions in the Pixenate software running on the web server.
This variable defines a namespace within which all of the Pixenate photo-editing functions are defined.
Go back in time 'offset' number of operations. Clients should not call this function directly. Use the PXN8.tools.undo() and PXN8.tools.redo() functions instead.
PXN8.tools.history(-1);
 // same as PXN8.tools.undo();

 PXN8.tools.history(+1)
 // same sas PXN8.tools.redo();
PXN8.tools.undo PXN8.tools.redo
Undo the last operation.
PXN8.tools.undoall PXN8.tools.redo PXN8.tools.redoall PXN8.tools.history
Redo the last undone operation.
PXN8.tools.undo PXN8.tools.redoall PXN8.tools.history
Undo all changes that were made to the photo
PXN8.tools.undo PXN8.tools.redoall PXN8.tools.history PXN8.tools.redo
Redo all changes made to the photo.
PXN8.tools.undo PXN8.tools.redoall PXN8.tools.history PXN8.tools.redo
This function takes an array of operations as a parameter and submits the operations to the server to update the image. This function is called by all other PXN8.tools.* functions (except PXN8.tools.undo(), PXN8.tools.redo(), PXN8.tools.undoall(), PXN8.tools.redoall() ).
The following code will crop the photo and rotate it by 90° ...
PXN8.tools.updateImage([
                         {operation: "crop", top: 40, left: 40, width: 200, height: 200},
                         {operation: "rotate", angle: 90}
                        ]);
PXN8.tools.updateImage() can be used to combine multiple image-editing operations into a single user operation (to the user it appears to be one operation even though the image goes through two transformations, being first normalized and then enhanced). When the user clicks Undo, both the crop and rotate operations will be undone. PXN8.tools.updateImage() is really useful if you would like to create your own custom 'quick-fix' operations which are combinations of existing operations. Please see API Operations for a full list of operations
If you want to combine multiple image-editing operations into a single atomic user operation, you can do so by bracketing the operations with PXN8.tools.startTransaction() and PXN8.tools.endTransaction().
PXN8.tools.startTransaction();

 PXN8.tools.snow();
 PXN8.tools.rotate({angle: 90});
 PXN8.tools.resize(40,40);

 // commit changes to the server
 PXN8.tools.endTransaction();
In the above example, the PXN8.tools.snow(), PXN8.tools.rotate() and PXN8.tools.resize() set of statements will be treated as a single user operation. If the user clicks 'Undo' all 3 operations will be undone. Please see Combining many operations in a single click.
If you want to combine multiple image-editing operations into a single atomic user operation, you can do so by bracketing the operations with PXN8.tools.startTransaction() and PXN8.tools.endTransaction(). PXN8.tools.endTransaction() commits changes to the server.
PXN8.tools.startTransaction();

 PXN8.tools.snow();
 PXN8.tools.rotate({angle: 90});
 PXN8.tools.resize(40,40);

 // commit changes to the server
 PXN8.tools.endTransaction();
In the above example, the PXN8.tools.snow(), PXN8.tools.rotate() and PXN8.tools.resize() set of statements will be treated as a single user operation. If the user clicks 'Undo' all 3 operations will be undone.
Apply a digital filter to enhance a noisy photo. This is useful for smoothing facial lines.
Transform photo to span the full range of color values. This results in a more colorful, better balanced image.
instant_fix performs both 'enhance' and 'normalize'
PXN8.tools.enhance PXN8.tools.normalize
Fix the horizon on a photo: Uses two points (left and right) to ascertain what the correct angle of the photo should be. This function is a wrapper for PXN8.tools.rotate().
Rotate a photo or flip it.
If no parameters are supplied, the default is to rotate the photo through 90 degrees clockwise.
To rotate a photo 90 degrees clockwise...
PXN8.tools.rotate({angle: 90});
To flip a photo along the horizontal pane (mirror photo)...
PXN8.tools.rotate({fliphz: true});
Blur an area of the photo (or the entire photo).
To blur the entire photo with a radius of 2x2...
PXN8.tools.blur({radius: 2});
To blur an area of the photo...
PXN8.tools.blur({radius: 2, top: 4, left: 40, width: 400, height: 200});
Change the brightness, saturation ,hue and contrast of a photo.
To increase saturation by 20%...
PXN8.tools.colors({saturation: 120});
To increase contrast & reduce brightness by 20 %
PXN8.tools.colors({contrast: 1, brightness: 80});
To increase saturation, brightness, hue and contrast...
PXN8.tools.colors ({brightness: 110, saturation: 110, hue: 180, contrast: 2});
Contrast must be in the range -5 to +5. All other parameters must be in the range 0 - 200
Crop a photo to the dimensions provided. The most common way to call this is as follows...
PXN8.tools.crop();
... which will simply crop the photo to the currently selected area. This is equivalent to ... PXN8.tools.crop(PXN8.getSelection());
Crop the photo begining at 10 pixels from left, 200 pixels from the top and extending 40 pixels to the right and 80 pixels to the bottom...
PXN8.tools.crop({top: 10, left: 200, width: 40, height: 80});
A utility function to allow the user to preview what a crop based on the current selection would look like.
Apply a 'lens-filter' effect to the photo.This mimics the effect of using those tinted lens filters on SLR to create more dramatic skies. This tool is only available in Pixenate Premium edition.
The following javascript code will produce the image on the right...
PXN8.tools.filter({top: 125, color: '#ffa500', opacity: 80});
| Before | After |
|  |
The top property specifies where the filter should trail off completely. The filter is always applied starting at the top of the photo. If you would like the filter to begin at the bottom of the photo you should use the following code instead...
PXN8.tools.updateImage([
                        {operation: "rotate", flipvt: true},
                        {operation: "filter", top: 125, color: '#ffa500', opacity: 80},
                        {operation: "rotate", flipvt: true},
                        ]);
| Before | After |
|  |
Adds TV-like scan-lines overlaying the photo to make it appear like it is a screen-grab from broadcast TV. This tool is only available in Pixenate Premium edition.
PXN8.tools.interlace({color: '#ffffff', opacity: 66 });
| Before | After |
|  |
This function adds a 'lomo' effect to the photo. This is an atmospheric and artistic effect that darkens the corners and (optionally) saturates the colors so that the photo appears to have been taken using a Russian LOMO™ camera. This tool is only available in Pixenate Premium edition.
PXN8.tools.lomo({opacity: 30, saturate: true});
| Before | After |
|  |
Adds a fill-flash effect to the photo to brighten it. This is more subtle than using the PXN8.tools.colors() function as it composites a duplicate layer on top of the existing image using the 'SCREEN' compositing operation.
PXN8.tools.fillFlash();
| Before | After |
|  |
Adds snowflakes to the photo. This is basically a wrapper around PXN8.tools.overlay(). This tool is only available in Pixenate Premium edition.
PXN8.tools.snow();
| Before | After |
| 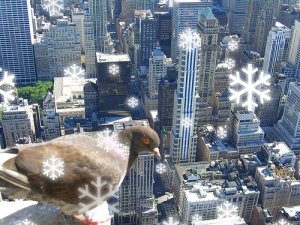 |
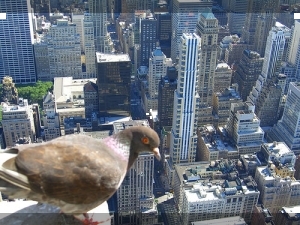
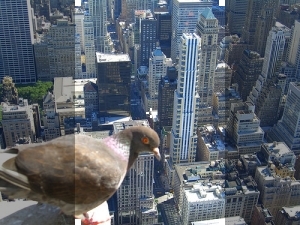
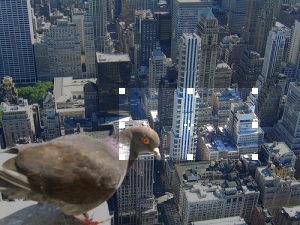
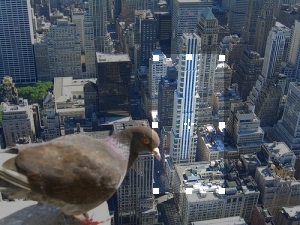
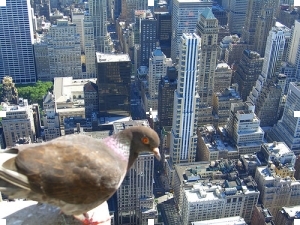
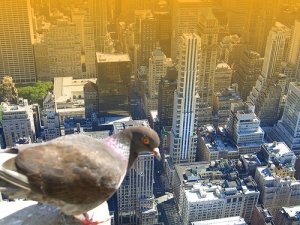
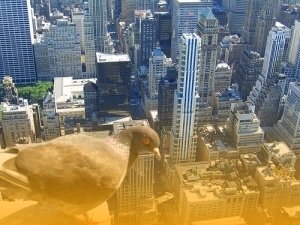
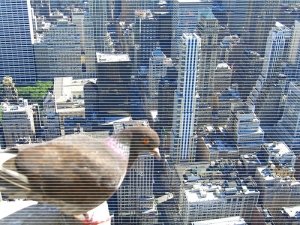
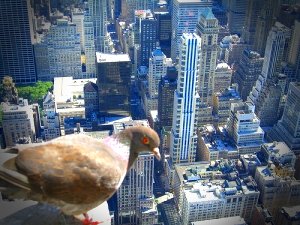
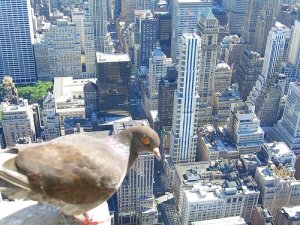
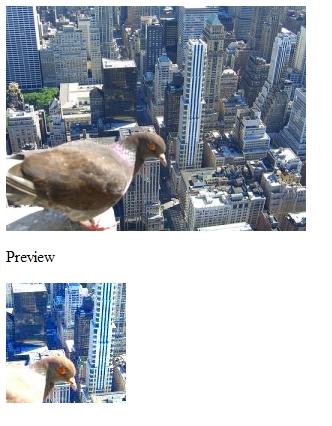
Overlays an image on top of the photo. The overlay tool is useful for superimposing clip-art and borders on top of photos. This tool is only available in Pixenate Premium edition.
Let's say your users have been working on a photo and would now like to stick it on to a background image to give it a border.

The border is 300 x 225 pixels in size and is a plain JPEG image (no transparency). What we are going to do is position the above image at the back of the photo.
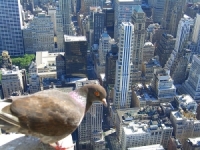
(a 200 x 150 photo) which will result in the following completed image
This can be achieved with the following code...
PXN8.initialize("/pixenate/docs/pigeon200x150.jpg");
 // more code..
 PXN8.tools.overlay({image: "docs/border1.jpg", position: "back", left: 50, top: 37});
Please see Adding Borders and Speech bubbles for more Examples.
PXN8.tools.snow() PXN8.tools.addText()
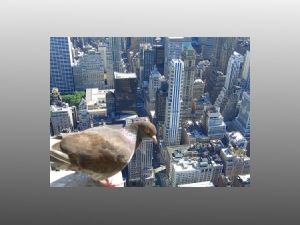
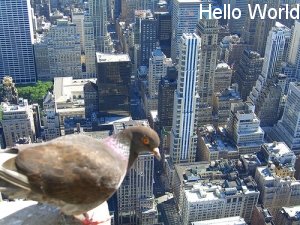
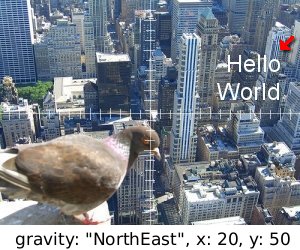
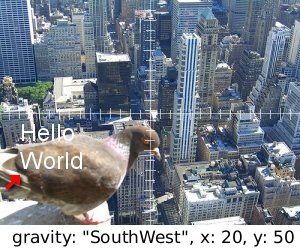
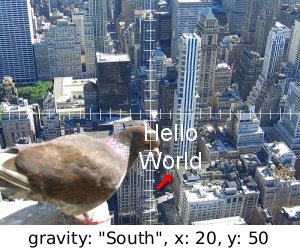
Adds text to a photo. This tool is only available in Pixenate Premium edition.
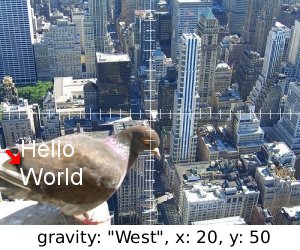
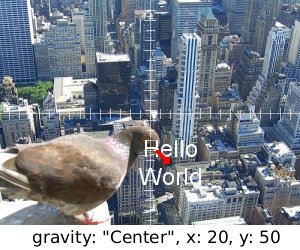
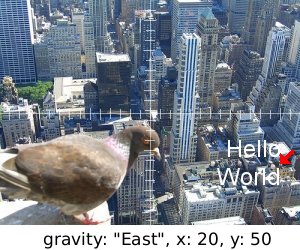
To position text on the photo using the gravity property...
PXN8.tools.addText({fill : '#ffffff', font: 'Arial', pointsize: 20, text: 'Hello World', gravity: 'NorthEast'});
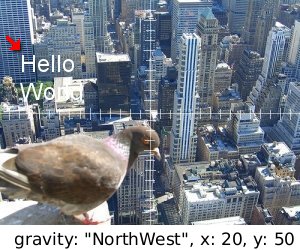
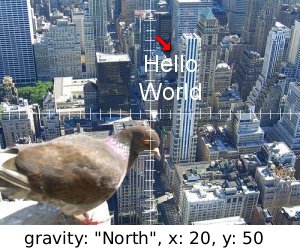
The following table illustrates how the gravity and x and y parameters are used in conjunction with each other. The red arrow in each diagram points to the adjusted position used for gravity...
 |
 |
 |
 |
 |
 |
 |
 |
 |
Please see Text Example for an example of how to position text on the photo.
Whitens off-color teeth. This tool is only available in Pixenate Premium edition.
Removes 'red-eye' from the specified area. This tool is only available in Pixenate Premium edition.
PXN8.tools.fixredeye({top: 40, left: 60, width: 75, height: 75});
Alternatively the geometry parameter can instead be an Array of geometry objects.
PXN8.tools.fixredeye([{top: 40, left: 60, width: 75, height: 75},
                      {top: 50, left: 200, width: 80, height: 94}]);
You must supply one or more rectangles to which the redeye fix will be applied. The rectangles should be approximately centered on the eye.
Resize an image to the specified width and height.
Add rounded corners to the image. This tool is only available in Pixenate Premium edition.
PXN8.tools.roundedCorners('#ffffff',32);
| Before | After |
|  |
Add a sepia-tone effect to the image. This tool is only available in Pixenate Premium edition.
PXN8.tools.sepia('#a28a65');
| Before | After |
|  |
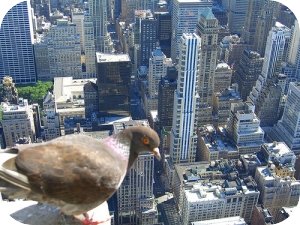
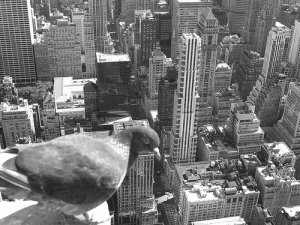
Make the image grayscale (black & white). This tool is only available in Pixenate Premium edition.
PXN8.tools.grayscale();
| Before | After |
|  |
Create a charcoal drawing from an image. This tool is only available in Pixenate Premium edition.
| Before | radius = 2 | radius = 5 |
|  |  |
Create an oil-painting from a photo. This tool is only available in Pixenate Premium edition.
| Before | radius = 2 | radius = 5 |
|  |  |
Fetches an image either from a remote server or the server's own filesystem. This is not normally called directly by client code.
Apply all changes to the photo which were performed in the current editing session to a high-resolution version of the image. Please note that as with all editing operations, this does not overwrite the original hi-res photo. This tool is only available in Pixenate Premium edition.
To save a hi-res version of your changes to the local client storage...
// A url for the hi-res version of the photo (this will never be displayed in the browser)
 var hires_image = "http://pixenate.com/images/samples/hires/garinish.jpg";

 //
 // this function will be called instead of the default PXN8.save.toDisk() function
 //
 function hires_save(){
     PXN8.tools.hi_res({url: hires_image}, on_hires_edit_complete);
 }
 //
 // the following function will be called when all changes have been
 // applied to the high-resolution photo
 //
 function on_hires_edit_complete(jsonResponse)
 {

     // grab the location of the hi-res photo
     var hires_edited_image = jsonResponse.image;

     // change the location to the new image
     var newURL = PXN8.root + "/save.pl?image=" + hires_edited_image;

     // open URL
     document.location = newURL;
 }

 // change PXN8.save.toDisk to point at our new function
 PXN8.save.toDisk = hires_save;
The 'mask' tool lets you apply a alpha-channel Mask to a photo. A mask is a grayscale image composed solely of colors, black, white and shades of gray. Dark areas of the mask will result in equvalent transparent areas in the photo, while white areas of the mask will result in opaque areas of the photo. This tool is only available in Pixenate Premium edition.
Please see example-mask-1 for a simple example of using the Mask tool. Refer to Face copy-and-paste for an example of how the mask tool can be used to copy and paste parts of a photo on top of itself.
PXN8.tools.crop PXN8.overlay.start PXN8.overlay.stop PXN8.ajax.submitScript
The Rearrange tool lets you move many parts of a photo around. This tool is only available in Pixenate Premium edition.
Please see example-rearrange for a simple example of using the Rearrange tool.
PXN8.tools.crop PXN8.tools.mask
Make a color within a photo transparent. PXN8.tools.transparent() can be called in 2 ways. You can provide x and y coordinates in which case the color at that point will be chosen and all pixels in the photo with the same color will be set to transparent. Or you can provide a color parameter.
Please see example-transparent for a simple example of using the Transparent tool.
Pixenate provides functions to create XMLHttpRequest Objects and to submit photo editing operations using custom JSON response handlers.
Create a XMLHttpRequest Object.
A new XMLHttpRequest Object.
Submit a series of image-manipulation commands to the server. This is the end-point through which all image manipulation commands are passed to the server. Normally you would not call this directly. However if you would like to make changes to a photo without changing the current working displayed photo, you can do so by calling this function and providing your own callback function. If you do so, then the current displayed image will not be updated.
var script = PXN8.getScript();
 PXN8.ajax.submitScript(script,function(jsonResponse){
     if (jsonResponse.status == "OK"){
        var image = jsonResponse.image;
        // do something with the image
     }else{
        alert(jsonResponse.errorMessage);
     }
 });
The following functions are used for saving the edited photo to the user's client-side storage or to the server's own storage on the web.
Save the photo to the user's client-side storage.
Save to server is a wrapper function. It in turn will call pxn8_save_image() which is a function which must be implemented by the customer.
PXN8.getUncompressedImage pxn8saveimage
This function is not provided by Pixenate but must be implemented by the customer if you want to be able to save edited photos to your own webserver.
The imagePath parameter will be a path relative to the directory where pixenate is installed.
For example the imagePath parameter might be cache/03_04fbcedaf099feded02working.jpg. If Pixenate is installed at /var/www/html/pixenate then the actual path to the file will be...
/var/www/html/pixenate/cache/03_04fbcedaf099feded02working.jpg
... so to save the image to your webserver's filesystem or database you need to copy the image at the above path to your own permanent storage. You should provide a .PHP, .JSP, .ASP or CGI program to do just this. Your pxn8saveimage() function should call this CGI passing the imagePath value as a parameter to the server program.
function pxn8_save_image( newImagePath ){
    //
    // newImagePath parameter will be something like...
    //
    // cache/03_04fbcedaf099feded02working.jpg
    //
    // ... this path is relative to where pixenate was installed

    if (newImagePath != false){
       document.location = "save.php?replacementImagePath=" + newImagePath;
    }else{
       alert("The image has not been modified");
    }
 }
PXN8.save.toServer PXN8.getUncompressedImage
The following functions are related to setting and getting the cross-hairs image (by default a white cross which is displayed in the center of the selection area), and also enabling and disabling the cross-hairs.
Enables or disables the display of the cross-hairs image at the center of the selected area.
Returns a boolean value indicating whether or not the crosshairs are displayed in the selected area.
true if the crosshairs are displayed in selections. false otherwise.
Get the Image URL currently used for displaying the cross-hairs at the center of the selected area.
A URL to the image used as the cross-hairs image. The URL returned will be an absolute URL including the domain name and full URL path.
You can change the cross-hairs image to suit your own tastes.
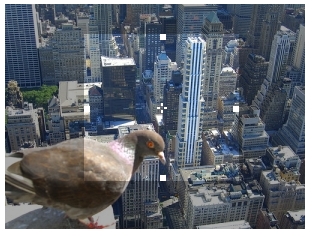
Pixenate allows you to display a "preview pane" on your page where you can see a preview of what the currently active tool (lomo, colors, etc) will look like. Ideally, the preview pane should only show a small section of the entire image. The user can click and drag inside the preview pane to show obscured parts of the image.
Multiple Preview panes can be displayed at the same time so each distinct preview pane must be associated with it's own preview state object. The preview state object just contains information about the state of the preview pane : the relative position of the background image and other information specific to that particular preview pane. When you initialize a preview pane, you must provide an Element Id.
An object which contains the state information for preview-related data for the supplied Element. This object should be later passed to the PXN8.preview.show() and PXN8.preview.hide() functions.
The following code will create a preview pane on the page. And will initialize the Preview pane with a 'colors' operation...
<div id="colors_preview" style="width: 120px; height: 120px;"></div>
 <script type="text/javascript">
    var colors_peek = PXN8.preview.initialize("colors_preview");
    PXN8.preview.show(colors_peek, {operation: "colors", brightness: 150, saturation: 150});
 </script>
PXN8.preview.show() PXN8.preview.hide() OPERATIONS
Shows the preview pane.
The operation parameter can be a single operation object (as described in OPERATIONS or an array of operation objects.
The following code creates two buttons to increase and decrease the saturation of the photo and show the change in a preview pane...
<div id="colors_preview" style="width: 120px; height: 120px;"></div>
 <script type="text/javascript">
    //
    // declare a global variable 'colors_peek' to be used by buttons too.
    //
    colors_peek = PXN8.preview.initialize("colors_preview");
    saturation = 100;

    PXN8.preview.show(colors_peek);

    function increase_saturation(){
       saturation += 20;
       //
       // Update the preview pane.
       //
       PXN8.preview.show(colors_peek,{"operation": "colors", "saturation": saturation});
    }

    function decrease_saturation(){
       saturation -= 20;
       //
       // Update the preview pane.
       //
       PXN8.preview.show(colors_peek,{"operation": "colors", "saturation": saturation});
    }
 </script>

 <button onclick="increase_saturation()">+</button>
 <button onclick="decrease_saturation()">-</button>

The following code demonstrates previewing a combined operation (Saturation and Interlace combined)...
PXN8.preview.show(colors_peek,
                     [{"operation": "colors", "saturation": saturation},
                    {"operation": "interlace", opacity: 50,color: '#ffffff'}
                     ]);
PXN8.preview.initialize() PXN8.preview.show() OPERATIONS
Hide (and clear) the preview pane. When you're finished with Preview Pane, you should call this method to clean up.
Please refer to the Preview Example.
PXN8.preview.show() PXN8.preview.initialize() OPERATIONS
The behaviour of the selection area can be modified using a single function which turns on or off the resize handles which appear at the sides and corners of the selected area.
Enable or disable the resize handles which appear at the corners and sides of the selected area.
To disable (hide) all of the handles...
PXN8.resize.enable(["n","s","e","w","nw","ne","sw","se"],false);
To enable the side handles...
PXN8.resize.enable(["n","s","e","w"],true);
Pixenate uses a number of the following DOM manipulation functions which can be used independently of Pixenate.
Remove all child nodes from the specified element. This method repeated calls Element.removeChild(Element.firstChild) until there are no children left.
element. The element which was passed in.
var el = PXN8.dom.cl(document.getElementById("myElement"));
 // this is equivalent to...
 var el = PXN8.dom.cl("myElement");
PXN8.dom.ac PXN8.dom.ce PXN8.dom.id
A convenience function which is shorthand for document.createTextNode().
The newly created TextNode object.
 var tn = PXN8.dom.tx("Hello World");
  document.body.appendChild(tn);
A Convenience function which is shorthand for document.getElementById()
The DOM Element object which has the matching id attribute. If no match is found then null is returned instead.
example: var el = PXN8.dom.id("myElementId");
A convenience function which is shorthand for document.createElement(). This function also allows you to set attributes for the element.
nodeType The nodename of the type of element you want to create, for example, if you want to create an img element then the nodename will be 'img'.
attributes (optional) An object whose properties are the attribute/value pairs for the new element.
The newly created DOM Element object.
 // create an image with src attribute = "myimage.jpg" and a 4 pixel border.
  var img = PXN8.dom.ce("img", { src: "myimage.jpg" border: 4});
A convenience function for specifying multiple CSS properties for an element
The element
// make the #palette DIV's background blue and it's font size 18px
 PXN8.dom.css("palette", { backgroundColor: "blue", fontSize: "18px" });
A convenience function which is shorthand for Element.appendChild().
The newly appended child DOM Element object.
var address = document.getElementById("address");
 var user = document.getElementById("user");
 PXN8.dom.ac(user,address);
 // the 'address' is now a child element of the 'user' element
Get the Bounds (size and coordinates) of an element on the page.
The element bounds for an element. Bounds are in the form of an object with the following properties... x, y, width, height
 var bounds = PXN8.dom.eb("myElementId");
  // bounds = {x: 48, y: 105, width: 200, height: 120}
PXN8.dom.ep PXN8.dom.cursorPos PXN8.dom.windowSize
Given an element, calculate it's absolute position relative to the BODY element.
An object with attributes x and y representing the coordinates of the top left corner of the element
 var pos = PXN8.dom.ep("myElementId");
  // pos = { x: 48, y: 105 }
PXN8.dom.eb PXN8.dom.cursorPos
Calculate the size of the browser window (it's outer width & height).
An object with 'height' and 'width' properties.
 var winSz = PXN8.dom.windowSize();
  // winSz = { height: 768, width: 1002}
PXN8.dom.eb PXN8.dom.cursorPos PXN8.dom.ep
Sets the opacity of a given element.
PXN8.dom.opacity("myElementId",0.5);
 // sets opacity of the 'myElementId' element to 50%
Return an array of elements with the supplied classname
An array of Element objects with a matching class attribute.
<span class="finance">Loan: $40,000</span>
 <span class="address">8092 Wolverdale drive</span>
 <span class="finance">Repayments: $800</span>
 <script type="text/javascript">
  var allFinanceElements = PXN8.dom.clz("finance");
  // allFinanceElements = [SpanElement{8092 Wolverdale drive}, SpanElement{Repayments: $800}]
 </script>
PXN8.dom.addClass PXN8.dom.removeClass
Removes a class from the element's className (or 'class' attribute).
element : An element or it's attribute id, from which you want to remove the class.
className : The name of the class to remove.
 // before
  // <span id="myElementId" class="finance private">Repayments: $800</span>
  PXN8.dom.removeClass("myElementId","private");
  // after
  // <span id="myElementId" class="finance">Repayments: $800</span>
PXN8.dom.addClass PXN8.dom.clz
Add a new class to the element's className (or class attribute).
Before...
PXN8.dom.removeClass PXN8.dom.clz
Does the element's className contain the supplied classname ?
true or false .
PXN8.dom.addClass PXN8.dom.removeClass
Returns the style of an element based on it's external stylesheet, and any inline styles.
A CSSStyleDeclaration object.
Return the current adjusted cursor position.
An object with height and width parameters.
Add a callback to the window's onload event. This is a convenience function which enables multiple functions to be called when the window.onload event is fired.
PXN8.dom.addLoadEvent(function(){
     alert("The window has loaded");
 });
The following section details some DOM-related event-handling functions used by Pixenate.
A cross-browser way to add event listeners - works with Safari, Internet Explorer and Firefox.
The callback function which was supplied as an argument.
var onButtonClick = PXN8.event.addListener(document.getElement("myButton"),"click",function(event){
    event = event || window.event;
    alert("You clicked the button!");
 });
A cross-browser way to remove event listeners - works with Safari, Internet Explorer and Firefox.
To remove a named function from the list of listeners for an event on a particular element...
PXN8.event.removeListener(document.getElementById("myButton"),"click",onButtonClick);
Pixenate provides 2 functions to simplify UI programming for overlaying photos. PXN8.overlay.start() puts the editor in overlay mode. In this mode, every time the user makes or changes a selected area of the image, an overlay image will be placed on top of the selected area. The overlay image will be resized to fit the selected area. This function provides a handy way for users to preview what the the overlay will look like when it is applied. PXN8.overlay.stop() makes the editor exit overlay mode.
PXN8.overlay.start() puts the editor into overlay mode. In this mode, an overlay image appears superimposed on top of the photo whenever the selection is changed. This function is provided as a convenience function to let users preview the effects of the PXN8.tools.overlay() function before applying it. Please note that PXN8.overlay.start() does not change the photo. You still need to call PXN8.tools.overlay() to apply the overlay.
Please see the Speech bubbles Example.
Makes the editor exit overlay mode. You should call this function when the user applies or cancels an overlay operation.
Please see the Speech bubbles Example.
Using the ImageMagick plugin, it is possible to call imagemagick functions from javascript. This can prove useful if you want to extend the features available in Pixenate without writing server-side Pixenate plugins in Perl. For complex functions, you should probably consider coding a server-side Perl plugin but for basic functions, you can now code a client-side javascript plugin. The following table shows how you might write the Fill-Flash plugin using only Javascript. On the left hand side is listed the javascript code to perform a fill-flash. This code uses the PXN8.ImageMagick API to call ImageMagick manipulation routines via javascript. On the right hand side is shown the equivalent code implemented as a perl server-side plugin.
| Javascript (client side) | Perl (server side) Equivalent |
|---|---|
 function fill_flash(opacity)
 {
    var image = PXN8.ImageMagick.start();

    var brighter = image.Clone();

    if (!opacity){
       opacity = 50;
    }

    image.Method("Composite",{"image": brighter,
                              "compose": "Screen",
                              "opacity": opacity + "%"});

    PXN8.ImageMagick.end(image);
 }
|
 use strict;
 use Sxoop::PXN8 ':all';

 sub fill_flash
 {
   my ($image, $params) = @_;

   my $brighter = $image->Clone();

   my $opacity = 50;
   if (exists $params->{opacity}){
       $opacity = $params->{opacity};
   }
   my $imrc = $image->Composite(image   => $brighter,
                                compose => "Screen",
                                opacity => $opacity . "%");
   if (is_imagick_error($imrc))
   {
       die "FillFlash failed: $imrc";
   }
   return $image;
 }
 AddOperation('fill_flash', \&fill_flash);
 1;
|
PXN8.ImageMagick is the object used as a proxy for the server-side Image::Magick class. PXN8.ImageMagick is a Mock Object. Methods invoked on this object are not implemented in the client in realtime - the methods are invoked on the server when the PXN8.ImageMagick.end() method is called.
You construct a new PXN8.ImageMagick object like so...
var myImage = new PXN8.ImageMagick();
... However, it is more common to simply use the default PXN8.ImageMagick() object returned by the global PXN8.ImageMagick.start() method.
The PXN8.ImageMagick object has just 4 methods.
Method : Use this to invoke image manipulation routines on the image. For a full list of methods available you should consult the ImageMagick website. http://imagemagick.org/script/perl-magick.php#manipulate. ** Method takes 2 parameters, the name of the Method (e.g. "Crop", "Rotate", "Draw" etc) and the parameters for the method. Please bear in mind that PXN8.ImageMagick is a mock object - the Method method lets you use the full array of ImageMagick manipulation routines.
Clone : This works exactly like the Clone function in ImageMagick. It creates a deep copy of an existing image.
Append : This will append all images side by side.
push : pushes an image on to the image stack. (equivalent to perl code : push (@$image1, $image2) ;)
In addition, there are 2 static functions belonging to the PXN8.ImageMagick class.
PXN8.ImageMagick.start() : This returns an object which is a reference to the current image. (see example of use above)
PXN8.ImageMagick.end(image, updateFlag) : This commits all of the ImageMagick operations to the server and indicates which of the images to send to the editor. There is an optional updateFlag which indicates whether or not the operation should be committed or simply returned. It might be useful to simply return the operation if you would like to include it as one of a batch of operations (see PXN8.tools.updateImage() ).
The following snippet of code will create a reflection at the bottom of the current image.
//
 // start an editing session using PXN8.ImageMagick
 //
 var image = PXN8.ImageMagick.start();

 var reflectionHeight = 100;
 var imageWidth = PXN8.getImageSize().width;

 //
 // clone the image and flip the clone
 //
 var flipped = image.Clone();
 flipped.Method("Flip");

 //
 // create a white background for the reflection to fade to.
 //
 var white = new PXN8.ImageMagick();
 white.Method("Set",{size: imageWidth + "x" + reflectionHeight});
 white.Method("Read", "xc:white");

 //
 // create a gradient mask to apply to the flipped image
 //
 var mask = new PXN8.ImageMagick();
 mask.Method("Set", {size: imageWidth + "x" + reflectionHeight});
 mask.Method("Read", "gradient:#000000-#FFFFFF");
 mask.Method("Set", {matte: false});

  //
 // apply the mask
 //
 white.Method("Composite",{image: mask, compose: "CopyOpacity"});

 //
 // superimpose the faded white on top of the flipped image
 //
 flipped.Method("Composite",{image: white, compose: "Over", x:0, y:0});

 //
 // crop the flipped image
 //
 flipped.Method("Crop",{x:0,y:0,width: imageWidth, height: reflectionHeight});

 //
 // push the flipped image on to the original
 //
 image.push(flipped);

 //
 // append the images
 //
 var reflection = image.Append(false);

 //
 // Commit the operations to the server
 //
 PXN8.ImageMagick.end(reflection);
You can see the example code in action here.
An example of how to create a fake-polaroid effect using Pixenate's ImageMagick bridge is available here.
An example of adding a grey border to make a rectangular image square is in Example #3.
A more advanced example of using PXN8.ImageMagick to create a clone tool that uses free-hand selection can be found here.
This utility function will return a PXN8.ImageMagick() image object which is a mask constructed (white on black) from the supplied paths. If you want to reverse the mask then call the ImageMagick "Negate" method on the returned object. This function can be used in conjunction with PXN8.freehand.* functions to create a mask from a path. This can be very useful for creating freehand masks, e.g. for more fine-grained application of tools such as Red-Eye and teeth-whitening.
A PXN8.ImageMagick() object which is a white-on-black mask constructed from the supplied paths.
PXN8.freehand.Path() PXN8.freehand.start() PXN8.freehand.end() PXN8.ImageMagick.start() PXN8.ImageMagick.end()
Pixenate allows you to do freehand drawing on top of an image. This is achieved by first calling PXN8.freehand.start() to put the editor in a state ready for drawing. Once the editor is in this state, the user can draw freehand lines of any color and width by moving the pointer while the mouse button is held down. The color can be set using the PXN8.freehand.color property. The width of the line can be set using the PXN8.freehand.width property.
N.B. PXN8.freehand is a relatively new feature of Pixneate. It depends on Raphael javascript libraries.
Set this property to change the default color that a new PXN8.freehand.Path object will use, when created in freehand mode. Color should be a hex string. Default value is "red"
PXN8.freehand.color = "#00ff00"; // green
Set this property to change the default opacity that a new PXN8.freehand.Path object will use, when created in freehand mode. Default value is 0.
PXN8.freehand.opacity = ; // green
Set this property to change the default brush width that a new PXN8.freehand.Path object will use, when created in freehand mode. Width should be numeric.
PXN8.freehand.width = 12; // a brush 12x12 pixels.
Line drawing in Pixenate is achieved by passing an array of PXN8.freehand.Path objects to the PXN8.tools.freehand() function. The easiest way to construct an array of Path objects is using the PXN8.freehand.start() / PXN8.freehand.end() pair of functions. What these functions do is place the editor in a special mode where the user can draw freehand lines using the mouse (Each line in a freehand drawing is equivalent to 1 PXN8.freehand.Path object so a freehand drawing can be thought of as an array of PXN8.freehand.Path objects).
PXN8.freehand.end PXN8.tools.freehand
This function takes the editor out of freehand drawing mode and back to its standard editing mode. All previous settings are restored.
PXN8.freehand.start PXN8.tools.freehand
A function for fine-grained undo of individual paths within a freehand drawing. This function will remove the last path created in freehand mode.
A PXN8.freehand.Path() object contains all of the information and methods for drawing a Path ( a series of lines ) both on the client (using Raphael JS library) and on the server (using Pixenate / ImageMagick).
A new PXN8.freehand.Path object.
//
 // create a square 50 x 50 starting at point 100, 10 (100 from
 // left, 10 from top)
 //
 var myPath = new PXN8.freehand.Path(2,"#ff0000", 100, 10);
 myPath.lineTo(150, 10);
 myPath.lineTo(150, 60);
 myPath.lineTo(100, 60);
 myPath.lineTo(100, 10);

  //
 // bake the path into the image
  //
 PXN8.tools.freehand([myPath]);
The lineTo() method is used to plot a new point on the path to which a line will be drawn.
Allows freehand drawing on top of an image.
//
 // create a square 50 x 50 starting at point 100, 10 (100 from
 // left, 10 from top)
 //
 var myPath = new PXN8.freehand.Path(2,"#ff0000", 100, 10);
 myPath.lineTo(150, 10);
 myPath.lineTo(150, 60);
 myPath.lineTo(100, 60);
 myPath.lineTo(100, 10);

 //
 // bake the path into the image
 //
 PXN8.tools.freehand([myPath]);
See also: Freehand Drawing Example
PXN8.freehand.Path PXN8.freehand.start PXN8.freehand.end
This section is only applicable if you would like to know more about using Preview Panels or combining multiple photo operations into a single user operation. Every change which can be made to a photo is performed using 'operations'. Operations are Javascript objects which are of the following form...
{operation: "operation-name", ...}
... where "operation-name" is a string which is one of the following...
For example, to rotate an image thru 90° you could do the following...
var rotate90 = {operation: "rotate", angle: 90};
 PXN8.tools.updateImage( [ rotate90 ] );
... or simply call...
PXN8.tools.rotate({angle: 90});
In fact using the PXN8.tools.* functions is the recommended approach for simple operations. Where knowledge of the above operation names becomes important is in the following scenarios...
If you want to combine two or more operations into a single atomic user operation please use PXN8.tools.startTransaction() and PXN8.tools.endTransaction().
Pixenate uses a number of special HTML elements. Please note that not all of these elements need to be included on your photo editing page. In fact the only element which is absolutely required is the pxn8_canvas element which can be simply included like this...
<div id="pxn8_canvas"></div>
All of the elements described below are nested inside of the top-level pxn8_canvas element...
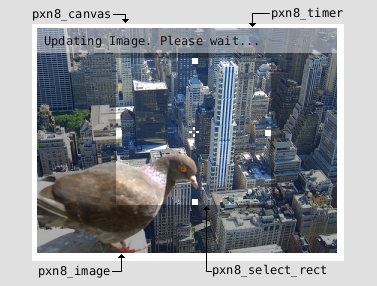
This element must appear on the web-page. It is the container for the photo and the selection area.
<div id="pxn8_canvas"></div>
This DIV can be styled however you wish. It is recommend however that the padding style property is unchanged. If no position style property is specified, it will default to relative. If no float style property is specified, it will default to left.
This is the <img> tag used to display the photo being edited. This tag does not need to be included on the web-page as it will be added automatically during PXN8.initialize().
This is a DIV which appears whenever the photo is being updated. The pxn8_timer div is (by default) appended to the pxn8_canvas div and you can style this element however you wish. E.g. to make the update message appear at the top of the photo, add the following CSS rule ...
#pxn8_timer { position: absolute; top: 0px; left: 0px; }
This div does not need to be declared in the HTML as it will be automatically added by Pixenate™. If not declared in HTML, the pxn8timer div will be nested inside the pxn8canvas div.
This is a DIV which appears whenever the user tries to 'undo' when there are no operations left to undo or when the user tries to 'redo' when there are no operations left to redo. You can style this div however you wish...
#pxn8_warning { position: absolute; top: 0px; left: 0px; }
This div does not need to be declared in the HTML as it will be automatically added by Pixenate™. If not declared in HTML, the pxn8warning div will be nested inside the pxn8canvas div.
This is the selection rectangle which appears around the selected area. This div does not need to be declared in the HTML as it will be automatically added by Pixenate™.
This is an optional wrapper DIV element which should surround the pxn8_canvas element if you want to constrain the size of the Canvas. See the Constraining Canvas size section in the Customization Guide for more details.